Wednesday 29 December 2010

Dynamics Tests: Candle Test 01, making another script

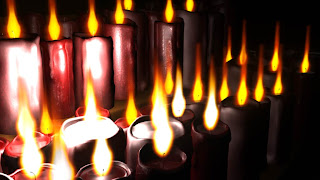
My next job was to create another very important effect that was central to our opening and closing scene. I took on board the challenge of creating multiple candles that would change under the atmosphere.

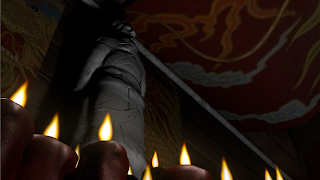
In our composition, we open our scene with gentle candles light a room. Starting with a close up that is blurred in, and then cutting to a mid shot. Just after this we have a close up shot of a candle moving with an introductory shot of the emperor statue. The next time we see candles, they are being blown in the wind through the discovery of the factual situation of the ship, and finally the closing shot ends with an extinguishing fame of the last candle flame. The significance on the scenes place highly their importance in our short film. Hence trying to simulate accurately the flickering was crucial.

Analyzing the first two shots- I concluded that a smart way to go about finishing them was to create the mid shot, then create an additional camera to suit the first close up- Hence i would complete two shots in one provided that I created realistic candle light.

This was a prime example of some excellent team work. The statue was modeled by Ollie, the candles were modeled and textured by Steph, now I had to set up the lighting and the candles. This required constant communication between the group and good organization with project files etc.

Here is the image I was asked to follow.


On top of this I had to create a number of these candles similar yet unique. 

At first I tried experimenting with fluid containers by creating one, caching the simulation and the replicacted it on another empty fluid container. I also considered using sprites, and image sequences but I felt that I was not able to create the uniqueness of each candle. 

I decided that the best way to achieve a number of unique candles was to individually create them. Before doing this I had to create one first.


Having not been very familiar with fluids, I was overwhelmed, just as with the ocean shots, with the number of attributes that make up a fluid emission. However I used the knowledge that I gained from the ocean scenes- i.e taking a systematic approach to tweaking settings.

I eventually found that fluids have a wide range of controls to determine the way they look. One has indivual controls on the turbulence, boyancy and other key fluid attributes for values such as temperature, fuel etc. 

Once I had one candle flame- I faced an even bigger problem. How to create many? I found that simple duplication did not produce the result. 

I decided to make a simple script. Firstly I took all of the important candle.shape attributes needed to create the colour and feel that I wanted.

After this, I wrote a script that created candle flames of an exact type to match up with the first approved candle. I applied this script several times and placed them appropriately. 

Finally I create a cool script which selected every single fluid container and the altered the "start frame" attribute from -100 to -50 frames before the desired time.  This meant that every single candle flame started at a random time- meaning a slightly subtle but necessary difference between each flame.

Here are some test images and videos that show the progress of my work.


Here is the final tweak of the candle shot


Friday 24 December 2010

More Shatter Tests Finalized

Here are some screenshots which demonstrate the application of the shatter script on my 3 separate geometries.


Here are the final versions of my shatter effect that would eventually be used in the final product.


Final Statue crumble test...


Final Rendered scene:


Without Ray trace shadows:


Greg Managed to spot a very interesting point about this scene. He wondered if I was using shadows to be emitted from all lights- but in particular- the ones below. I discovered that I was not and upon re-rendering found a vast change in the scenes' overall depth and impact.


With ray traced shadows...the final render


Statue crack shot


The Final render...

Sunday 19 December 2010

Applying the Shatter Script- Destroying Anomalies!

Now that I had fully tested my script on a basic piece of geometry, the time had come to really put the script to the acid test. I had not yet had any experience in doing these various effects on objects imported from Z-Brush where Ollie Kane had sculpted the model and hence was apprehensive about it. How would the model be affected with regards to its topology?

With this in mind, I proceeded with testing. Here is the first model I received from Ollie and the consequent testing trial.


Doing this test taught me a lot about the necessary requirements that Ollie would need to adjust for me to optimize my shatter effect to its fullest.

On observing the video above, there were two main conclusions to be derived.

Probably the biggest error of all is found with the head. You will notice that it is completely unaffected by the shatter effect. Upon discussing the matter with him further, my suspicion was proved correct that the head had two major defects.  One was that the head was not a closed piece of geometry. By definition a solid shatter would fail to effect it as it is not even a solid piece, i.e closed. Its second major flaw was that it was simply combined from one mesh from two. I will address this point later as it sparked an idea for improvement. But one may see how confusion may arise as to what needs shattering if the mesh is one combined mesh from multiple objects.

The second point that you will notice is that even though I pushed the shard count as high as I could, we have a very uneven distribution of shard sizes. Thinking about this problem, I had two objectives to achieve- to increase the number of shards and keep these pieces relatively equal in size. I decided that if i wanted Maya to be optimized then it would be better to have the mesh separated into three (or ideally more) separate uncombined pieces. In this way- we would avoid having very large pieces that span the model from to bottom, and this also means that the maya shatter can be applied on each piece separately.

Since Maya struggles with calculating a high count of shard shatter in one go- it logically foillowed that maya may be able to to multiple shatters one turn at a time. i.e instead of applying a 100 piece shatter on the entire statue, model the statue into 3 pieces and create 3 shatters each with 33, 33, 33 shatters- these two operations are equal, yet one may cause maya to each and one will not. In this way I managed to create a shard count that exceeded 600 pieces all in all, where as when i tried applying a shatter before, the maximum shard count was under 50.


Then I was able to apply the collision layer correction script to then avoid any issues that would cause errors.


Here a sequence of videos that depict the evolution of my effect based on the logic above.


Here the tweaking was made to create a slow motion effect from the shatter.

Saturday 18 December 2010

Developing a Script

Having made a shatter that fundamentally worked with a reduced number of shards, the time could now be invested in solving the problem for any number of shards.

Effectively the only thing which was required to be done was to alter the collision layer. This is a relatively simple task in scripting. However I purchased a tutorial which gives a very detailed rigid body solution. Not only does the script alter collision layers, it also has options to alter initial velocities/rotations between a random range.

After listening in on what the script set out to do- i.e the pseudo code, I stopped the tutorial and continued to make the entire script from scratch with only a few parts cross verified (usually to do with graphic interface).  One way to substantiate this is that the tutorial was written in MEL, where as I program mainly in python and therefore the script can not be directly copied with out a fundamental understanding of scripting.

Having set out to do this, I created the entire script successfully and eliminated all the problems I encountered before. Here are a few tests that demonstrate the progression of a basic test. Since Maya finds the shatter effect a very difficult calculation, I decided to increase the shard count progressively.

I also incorporated a turbulence field or radial field along side the gravity field.


Shard Count: 15         field: turbulent and gravity


Shard Count: 50         field: turbulent and gravity


Shard Count: 70         field: gravity and radial


Shard Count: 70         field: gravity and radial          (Animated camera)

Friday 17 December 2010

Dynamics Tests 01: Shatter Effects

One of the most powerful scenes in our entire project is the shatter effect when our emperor statue crumbles into numerous pieces and then collapses to the floor when the audience finds out the emperor is dead. Since I had taken on the challenge of dealing with the majority of the dynamics effects, this was my chance to start experimenting with other various dynamics within Maya. One such effect is the shatter effect.

When I first started experimenting with shatter effects, I stumbled into serious problems. It seemed that the script which invokes a solid shatter was refusing to accept the geometry that I attempted to test.

I finally gathered resources from the internet that suggested that geometry should not have any history. Even after this I found that Maya would create the shatter, but when trying to run a gravity simulation, numerous errors would be returned in the script editor. If not maya would crash.

Trouble shooting this problem I discovered that the source of the problem was due to the collision layer. The collision layer is an essential part of rigid body dynamics which determines which geometry collides with which other geometry. If geometries are in the same layer (indexed numerically)- this means they will collide, if not- then they shall not.

So the question was why did the shattered materials crash Maya?

It is a common knowledge to those dealing with dynamics (and especially ones involving collisions) that no two objects should start touching/overlapping one another. This type of initial condition will cause maya to not simulate properly and even crash. How can maya work out the collisions between objects if they were overlapping. And obviously the shatter effect was causing this exact problem.

Knowing this was half way to finding the solution. All one would have to do is alter the collision layer on every geometry and they would be able to solve the problem for their simulation.

I did this initial test to make sure whether my logic was accurate. Here is my first shatter test with manually adjusted collision layers.


Thursday 16 December 2010

Research and Development: Ocean Test 03

Whilst I was fairly familiar with oceans and its attributes, it seemed like a good idea to start the stormy ocean. I managed to use very similar settings from my previous scene to start with. From here it was much easier to set up from here. I also experimented with fog and cloud to achieve some very nice results. Here are a collection of some of the working images.


I initially started with the waves. I used my previous setting as a basis for this one


Here I tried to experiment with particles to give rain in our scene


I found that instead of using particles in their standard "points" display setting, we could use streaks and multi-streaks to develop create rain.


Interestingly, the clouds in this background are a dynamics example inbuilt to maya. Using this as a basis, we got a close result to what we wanted.


with all of these in place, we felt that the scene required some more depth and atmosphere. Ollie Kane suggested that we could use fog to achieve this. Again using an inbuilt fluid example in maya as a basis,we created the following.


Tuesday 14 December 2010

Research and Development: Ocean Test 02

Having worked on the ocean shots over, I could simply not create the effect that I wanted. 

I found that starting a fresh often was better than amending something which was already incorrect. In this way I created six to seven attempts.

My final attempt was more promising and I developed a systematic way of approach. By now I rela


 Maya Ocean: Default


 My first approach is set the ocean scale, wave speed and wave direction. I generally found that these should be established first and not altered after.  Once this is set- then we can begin adjusting wave lengths etc.

In the following example, I set the turbulence of shorter wavelengths to by higher than the turbulence of large waves.

 The following shows the simple change observed when one switches to a mental ray render.


This is closer to the style that i was trying to achieve- achieved by tweaking the settings of the ocean colour. 


I soon discovered a key change which altered the entire look of the scene. By creating a Physical Sky. I was very pleased with the result. It seemed that including the sky completely altered


And now with Final Gather, we had an ocean that seemed vastly better than what we began with.


Saturday 11 December 2010

Research and Development: Ocean Test 01

The area of specialism that I wish to get into is based around effects. Hence I wanted to create the majority of the effects in our project. One of the key features of our animation was that it was set in the open sea. I was given the task of creating the appropriate ocean for two types of sea- one being a calm sea and one being stormy.

This was a great opportunity for me to experiment with this very complex and useful inbuilt tool of maya.

My first lesson was understanding that maya ocean, although located in the dynamics tab- is not really dynamics at all. It is a combination of an animated texture, coupled with displacement maps that are also animated to give the look of an ocean with waves etc.


Some of the initial renders look very bad but improve gradually.

Mayas' Default Ocean


Finding the appropriate wave/ocean size


At this stage I was still struggling to achieve the correct effect. This was partly due to the relative scene size (all modeled to scale).


Here you can see minor improvements in the sea, however it is quite obvious that there is serious issues with the visual.


This must urgently be corrected if we want to give the impression of an actual open sea shot.


I found that the most difficult aspect of testing maya ocean is that it contains such a wide variety of attributes that need to be altered. If I was to be successful in tweaking this ocean I would need to systematically make changes and simplify this multivariable problem.